ArrayPipe Online Documentation
[← previous] [up ↑] [next →]Sample Analysis
Significance Test
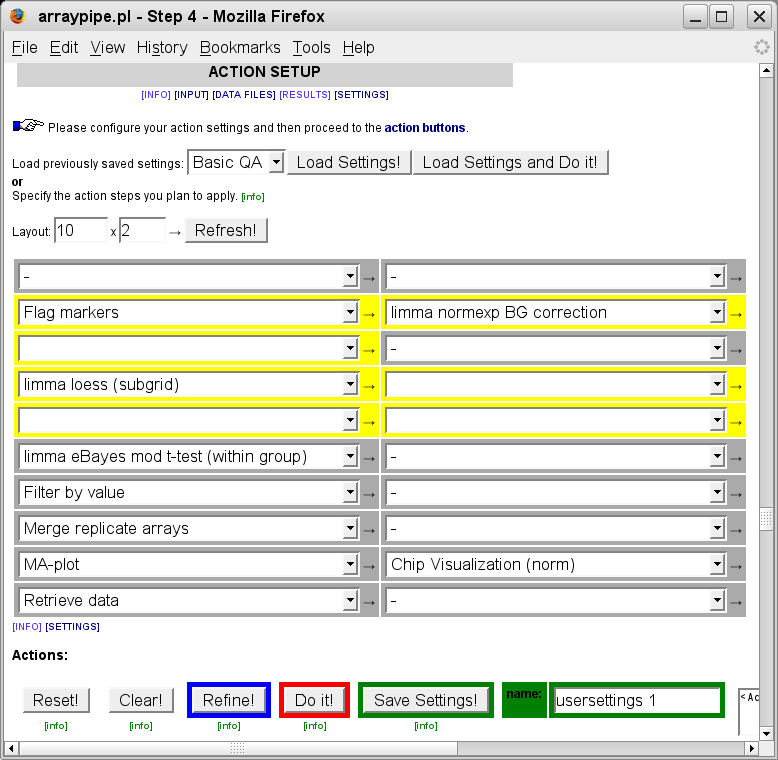
After deciding on the pre-processing methods we are now ready to complete the analysis for the detection of significantly differentially expressed genes. The following is a possible configuration of action steps:
Note: Limmas eBayes moderated t-test offers correction methods for
multiple testing but these are turned off by default.
Initially, only the settings for functions used in the previous step are available. After
adding new functions to the action menu you need to click on the 'Refresh' button to bring up
their settings section:
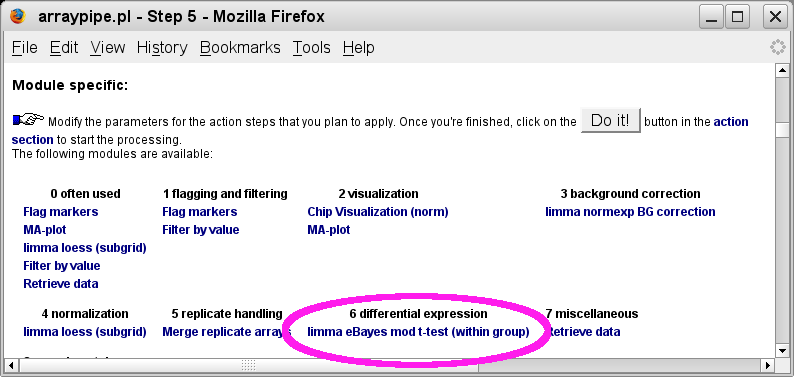
Follow links to the [SETTINGS] section and click on the link circled in pink that brings you to the t-test specific section:
(go to original page)
Change the setting for 'p-value adjustment' to the method of your choice. Here 'BH' is selected, which stands for 'Benjamin Hochberg' and reports the false discovery rate.
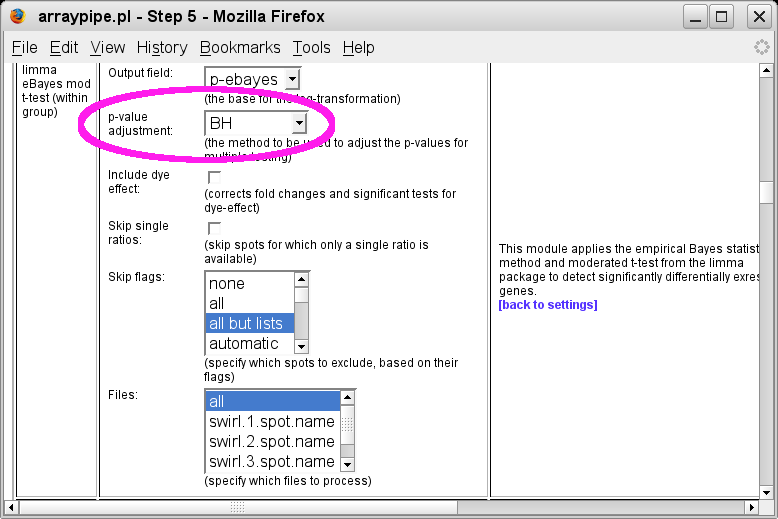
Follow the [back to settings] link and click on
the 'Do it!' button to start the data processing.
These are the results for the different actions in detail:
- Markers will be flagged as before to exclude all these spots from subsequent steps.
- Limma normexp background correction method is applied, which prevents negative values and therefore invalid spots to occur.
- The loess by subgrid method implemented in the limma package is used to remove dye-bias in each printtip group.
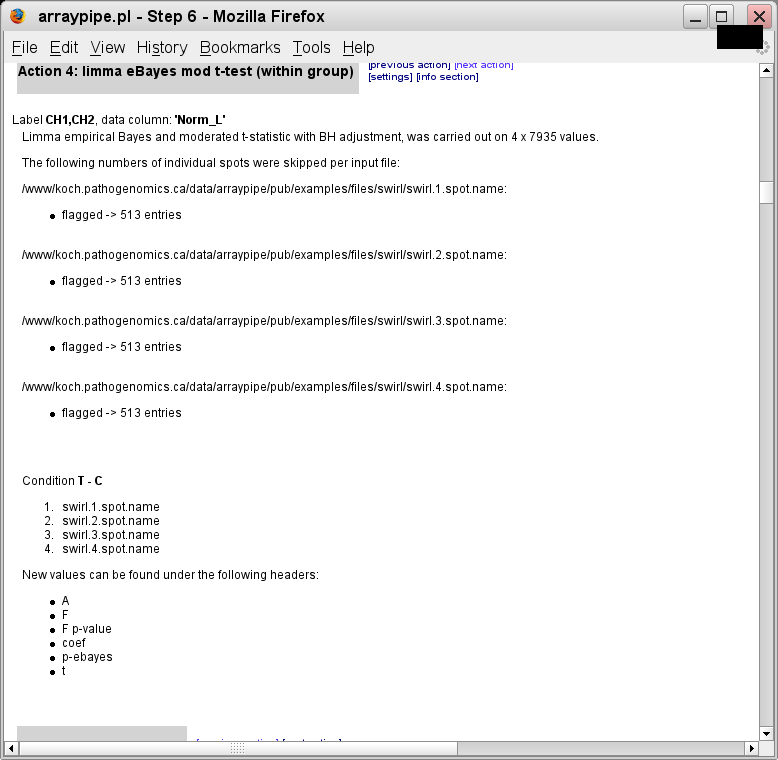
- Next an empirical Bayes moderated t-test (also from the limma package) is
applied to the four replicates, working on the null hypothesis that control
(wild-type fish) and treatment (swirl mutation) are the same:

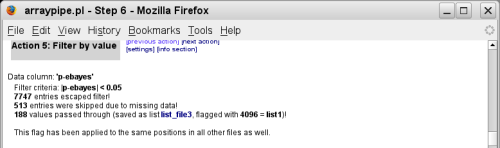
(go to original page) - The 'filter by value' method flags all spots that have a p-value smaller
or equal to 0.05. This flag (list1) is a positive highlighter rather than a
negative mark - it doesn't exclude these spots from subsequent analysis steps:
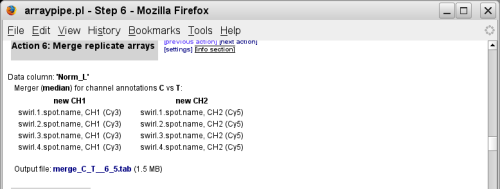
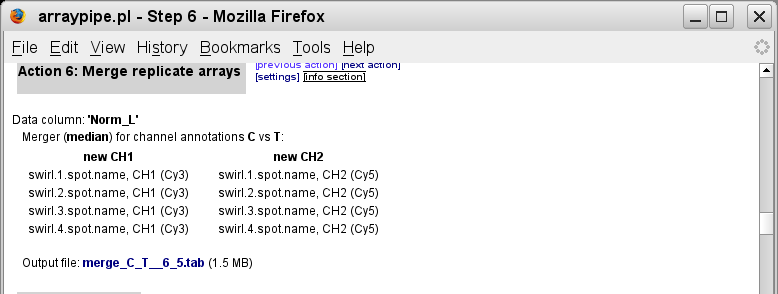
(go to original page) - The next action creates a new virtual slide that contains the median
values from the four replicates:
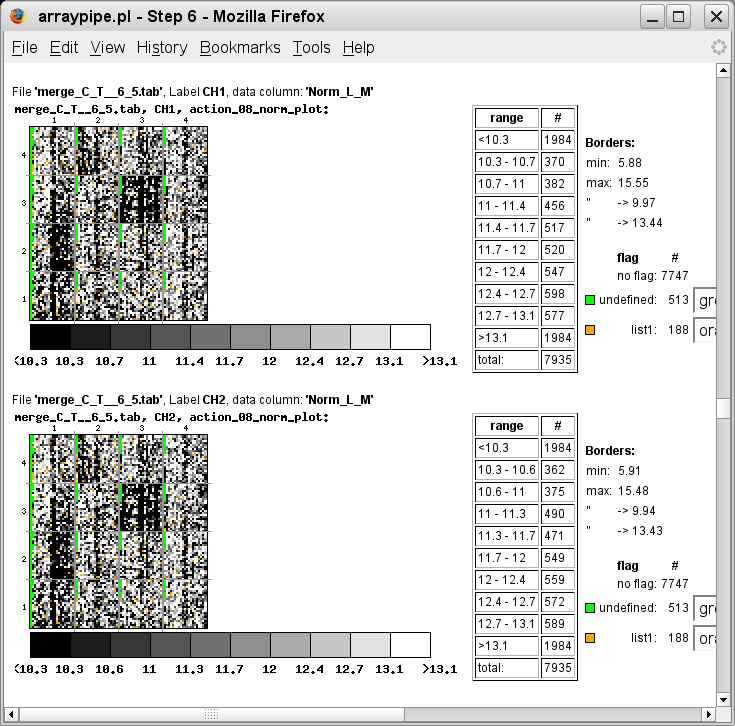
(go to original page) - The four original slides and the merged slide are plotted again, spots
with p-value <= 0.05 are coloured in orange:
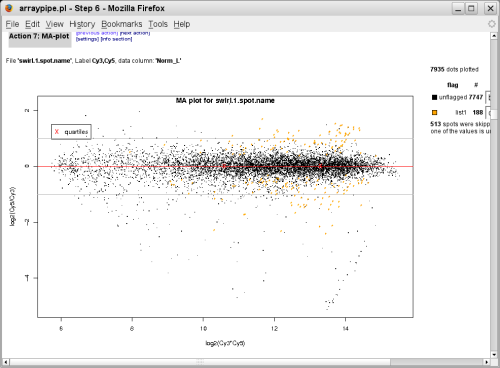
(slide 1, go to original page)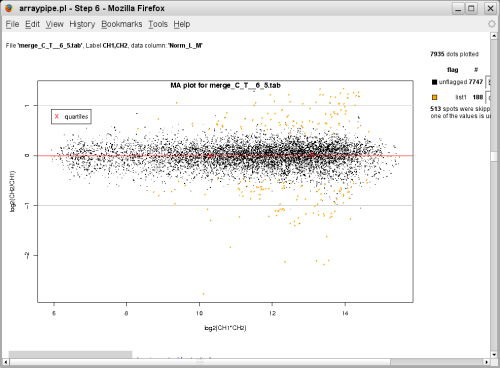
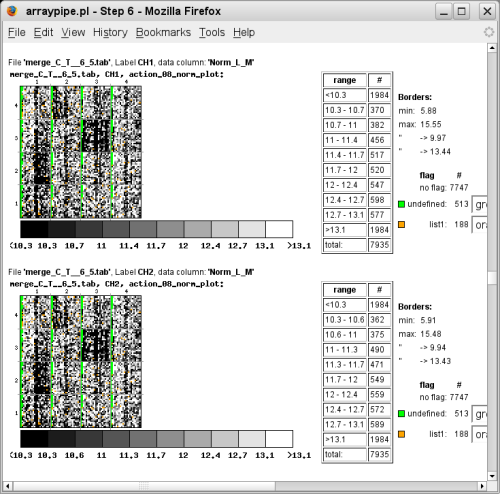
(merged data, go to original page) - Visualization of the chips using normalized values and significant spots
coloured allows to check for any spatial bias influencing the results:
(go to original page) - The last step prepares the data for download or presentation in a
web-based spreadsheet:
(go to original page)The full data sets comprising fold-changes and p-values for the individual slides as well as for the merged data can be downloaded as tab-delimited files.
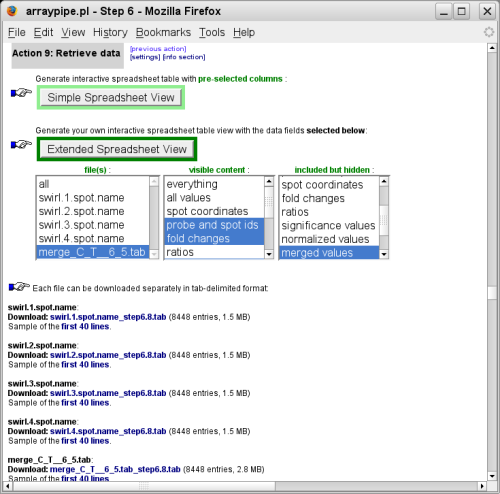
With the click on one of the two green buttons the data will be loaded into a webbased spreadsheet.
To see not only the merged data but also the fold-changes of the individual replicates beside it, select to load all files into the spreadsheet:
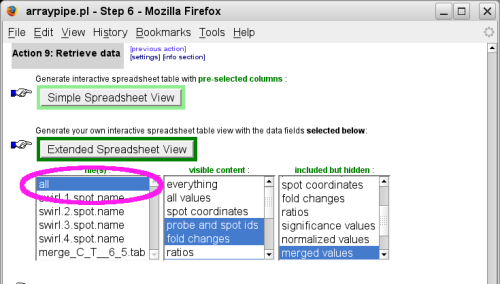
The difference between 'simple' and 'extended' spreadsheet view is that the first loads a pre-defined subset of all data columns for your selected files, whereas the latter allows some fine-tuning via the 'visible' and 'hidden' content boxes.


Home
for questions or remarks e-mail karsten_hokamp@sfu.ca.